
Getting Subtitles to Work on VLC
I’ve run into this exact problem before—trying to cast a movie from VLC to my Smart TV and then realizing the subtitles just don’t show up. It’s frustrating, but after a bit of trial and error, I figured out a couple of solutions for this problem. First, we need to determine if the issue is stemming from the device you’re casting to (Tablet, Smart TV, or Phone, etc.) Some devices don’t have actual support for subtitles.
- Load the subtitles before casting.
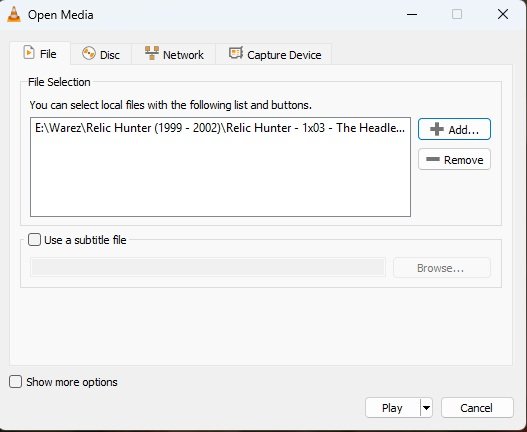
Open your movie in VLC on your computer or device first. Then go to the top menu → Subtitle → Add Subtitle File… and pick the subtitle file (.srt, .sub, etc). Make sure it actually shows up properly when you play it on your computer screen. - Check the subtitle track.
Sometimes VLC loads multiple subtitle tracks, and the wrong one is active. I usually right-click the video, go to Subtitle → Sub Track, and select the right one. I always check this before casting, because once you’re casting, switching tracks can be clunky. - Start casting after subtitles are working locally.
Once everything looks good on your computer screen, then I hit Playback → Renderer and choose my Chromecast/Smart TV. VLC basically tries to “mirror” the video with the subtitles burned in (if you added them beforehand). - If it still doesn’t work…
Here’s the part that tripped me up the first few times: not all formats play subtitles well when casting. What I usually do is go to Tools → Preferences → Subtitles/OSD and check that “Enable subtitles” is ticked. If it still refuses, the only reliable way I’ve found is to hardcode the subtitles—basically, re-saving the video with the subs permanently in. It takes a little longer, but then they’ll always show up when casting. - Quick hack (if you’re stuck).
Sometimes I give up on VLC casting subtitles directly and instead cast my desktop (whole screen) to the TV. Then, VLC is just playing locally with subtitles, and the TV is mirroring it. Not as smooth as native casting, but it works every time.
If none of these fixes are actually doing anything for you, please continue below for additional solutions on how to fix subtitles on VLC Media Player.

Changing Subtitle File Format Fix
In very rare circumstances, the problem may stem from the subtitle file format, usually they are in .ass, .srt, .sub, or perhaps even .idx – the solution is to try to convert the subtitle files (If you have them that is) to a different file format, which may actually enable you to see them when casting. See here the full list of supported subtitle files that VLC currently runs on.
- Subtitle Solution – Use GoTranscript to convert existing subtitle files into a different file format, and try loading them up in your VLC media player and see if there is any actual effect on how your casting device is reacting to it or the device where the file is being cast from. You can import a new subtitle file by right-clicking and choosing Subtitle > Add Subtitle file, and picking the new file.
Hardcoding Subtitles to your VLC Movies and TV-Shows
This method is actually the most tedious one to do, as it takes some time, depending on the tools you are using and how many things you are planning to fix regarding a single movie or multiple episodes. So here is how to hardcore subtitles in VLC or hardsub, as some people refer to it. If you need to extract subtitles from the file, you should have Clipchamp automatically installed on your Windows computer that can do that.
- First, get your VLC open and choose “Open Multiple files” and then pick the media file by pressing +ADD, and pick the video file you want to create the subtitles for. In the bottom corner, click the dropdown menu and choose “Stream” instead of “Play”. If you have a subtitle file, in that case choose browse for one and add it.
- On the next screen, you are simply going to hit the Next button, and you will come to the “Destination Setup” page, and on the bottom side, you will see another dropdown menu and pick “File” and then click add. After you are going to browse where to save the file, you can pick whatever you want, and the file name should be something you remember.
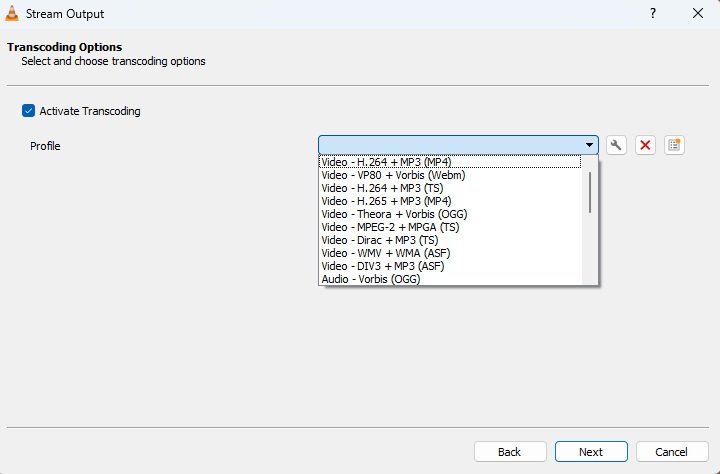
- Next, we are going to mess with the transcoding options. If you don’t know what you’re doing, I recommend going with the top “H.264 + MP3 (MP4)” option. Then click the wrench icon, and this takes us to the settings screen, and here we are going with the 4th tab that says “Subtitles”. Here we are just going to toggle “subtitles” and “overlay subtitles on the video”. The codec stuff doesn’t matter at all since we are hardsubbing here.
After this, just hit save & next, and click stream (Don’t toggle stream all elementary streams), and now what should happen is the actual conversion of the file, and the subtitles are now automatically encoded in.
Alternative Fast Fix for Subtitles
Ironically, the best and fastest fix for subtitle problems for VLC is actually using a totally different video player that doesn’t have the same issues. When you actually open VLC media player on mobile, it will even tell you that casting subtitles is not actually supported.


Leave a Reply